
Ok, so your phone was lost or stolen, and you had a Google Authenticator on it.
It happened to me, so I am pretty familiar with the process. I had enough when I lost my phone with Google Authenticator on it.
Then I discovered 1Password Password Manager, an excellent alternative to the Google Authenticator if you are currently searching for a good Password Manager.
By the way, did you know that the 1Password has an Authenticator application built into it that will automatically populate the 2FA codes for you on the login page both on your computer and the mobile browser?
I have been using 1Password for over three years now, and I cannot overstate how much I like this Password Manager. You can try 1Password for free for 14 days or visit the 1Password website for more information.
If you need help with exporting Google Authenticator to 1Password, make sure to check this article; Export Google Authenticator to 1Password.
Google Authenticator app is not the only second-step verification option available to you. The chances are that even if you don`t have access to the app, you will still be able to log in using alternative ways.
You may try to verify your account with Backup Codes or voice or Text messages. Unfortunately, if either process fails, you will have no choice but to use Google Help.
Verify your account Using Backup Codes.
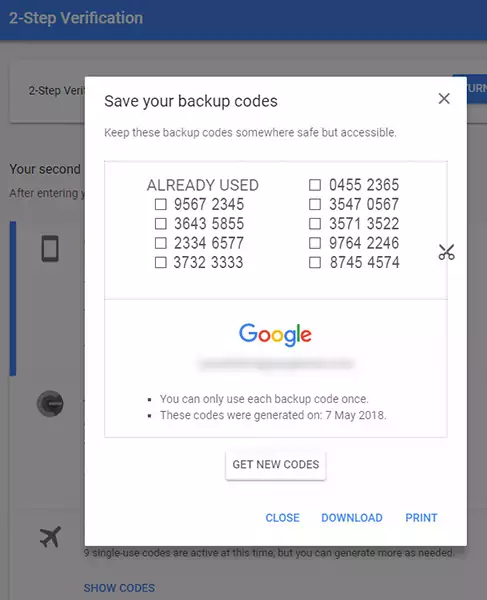
Most sites now offer Two-Factor Authentication. Once enabled, the service will provide you with Backup Codes.
Google, for example, issues the Backup Codes in the set of 10, and each is eight characters long. Each time you use the Backup Code, it becomes inactive. You can also generate a new set anytime.
To log in to your account, type your login and password. Then, on the 2-Step Verification form, press More Options. Google will let you choose other options to log in to your account.
Select Enter one of your 8-digit backup codes and type the code on the next screen.
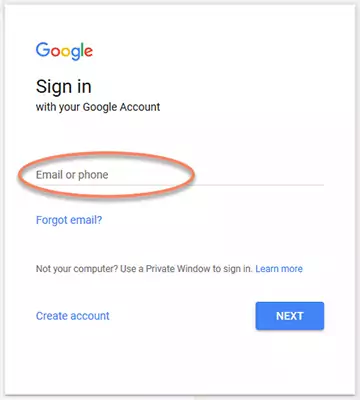
1) Type Your Email Address.
Go to Google and press Sign-In. Next, enter your email address and press Next.
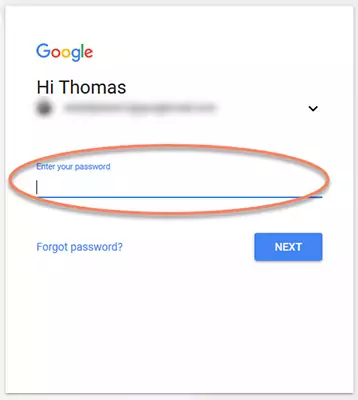
2) Type Your Password.
Type your password and press Next.
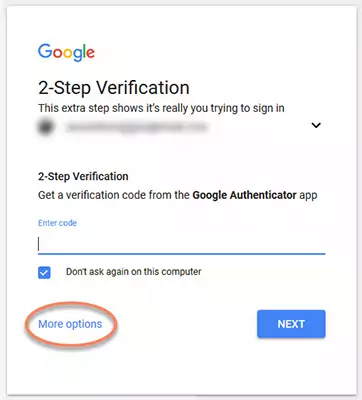
3) Select – More Options.
Instead of typing your Two-Factor Authentication code, press More Options to view the alternative authentication methods.
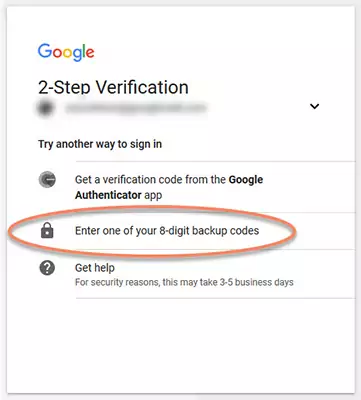
4) Select – Enter One of Your 8-Digit Backup Codes.
If you kept your Backup Codes, select the Enter one of your 8-digit backup codes options. If you don’t have the backup codes, you may have to try verifying the ownership by using the Get Help option. Keep in mind that this may take a few days, and it heavily depends on how much information you can provide to prove the ownership of the account.
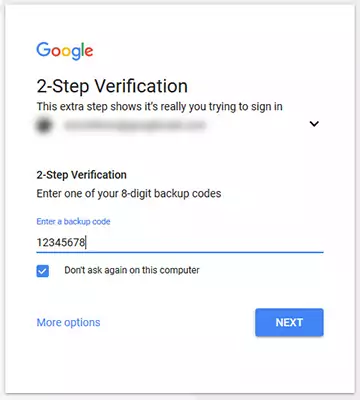
5) Type One of Your 8-Digit Backup Codes.
Type your 8-digit Backup Code and press Next. You have successfully logged in to your Google Account without using Google Authenticator. Use the Change Phone option and reset the Google Authenticator app by scanning the QR code using your new device.
Verify your account by Voice or Text Message.
Ok, so you have lost your Backup Codes, but there might be a tiny chance that when you set up your account for the first time, you have enabled the other verification method, which uses Voice or Text messages.
You may also like: Can I use Google Authenticator on Multiple Devices?
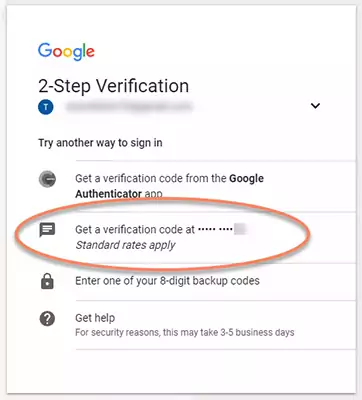
This method is similar to the one described for the Backup Codes, except that you select the Voice or Text message option.
Verify your account with Google Help.
Luckily, I never needed to use this option, but if you do not have the Backup Codes and verification method using Voice or Text message has also failed, this might be the last option available to you to access your account.
Pay attention to questions and give as much information as possible where appropriate when filling the Google Account Recovery Form. For example, I used one of my accounts to get through the process for this post.
However, I did not submit my form, so I am not sure how successful that might be and whether the waiting time is as described by Google. Go to Google, select the Sign In option, and follow the steps below to get to the Get Help option.
1) Type Your Email Address.
Go to Google and press Sign-In. Next, enter your email address and press Next.

2) Type your password.
Type your password and press Next.
3) Select – More Options.
Instead of typing your Two-Factor Authentication code, press More Options to view the alternative authentication methods.
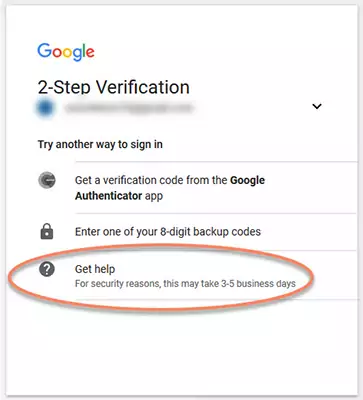
4) Select – Get Help.
Remember that this may take up to 5 days, so use this as a last resort. The process is straightforward, and you will need to fill out an account recovery form. You must answer some questions related to your account, for example:
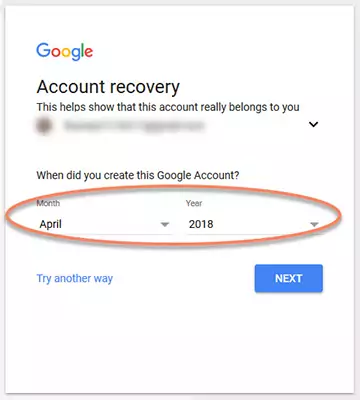
- When did you create this Google Account? (I had trouble with this one).
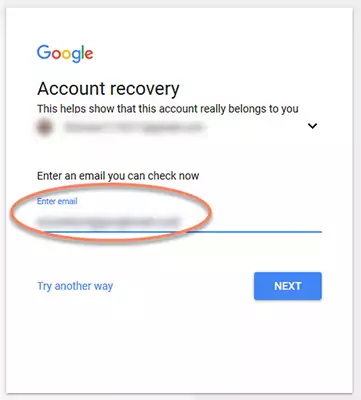
- Enter an email you can check now (Google will send you a single verification code to an alternative email).
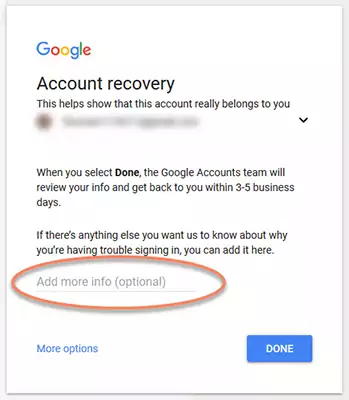
- You may also add additional information which will help Google to authenticate you.
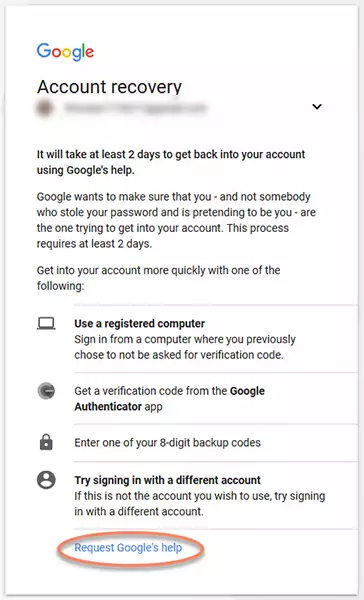
5) Select – Request Google Help.
Provide all the relevant information Google asks for.
6) Type the date.
Type the date you created your Google Account. When writing this post, I tried the Account Recovery option, and I have to admit that this was the most challenging question to answer. Unfortunately, I did not remember that date, so I had no choice and I skip this question.
7) Enter an email you can check now.
Type an email you can check now. Google will send you a six-digit code to confirm.
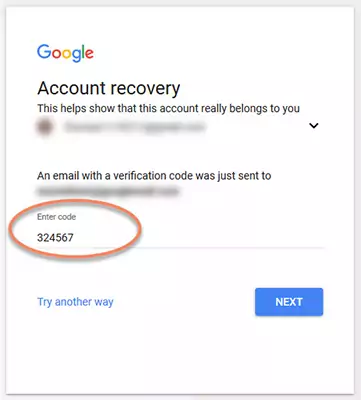
8) Confirm the code send to you earlier.
Check the email you give earlier for the code Google send you and type here to confirm it.
9) Add more information.
This is the last chance to add additional information that may help Google authenticate you and unlock your account. Once you press Done, the Google team will review the information you gave and may or may not accept your application.
You logged in to your account; what to do now?
Save your Backup Codes.
Keep your Google Account Backup Codes secure. I mean really secure, do not store them on the OneDrive, Dropbox, or any other cloud service. Also, do not keep them in your draft email – yes, I saw people doing this, using draft copies of emails as storage for private information.
You may also like: Transfer Google Authenticator 2FA codes to a new Phone.
Instead, print them or write them down and keep them somewhere safe, perhaps with your passport or other documents. Even better, make two copies and keep them in two different locations.
Apart from having printed my Backup Codes, I also keep a copy in my 1Password manager.
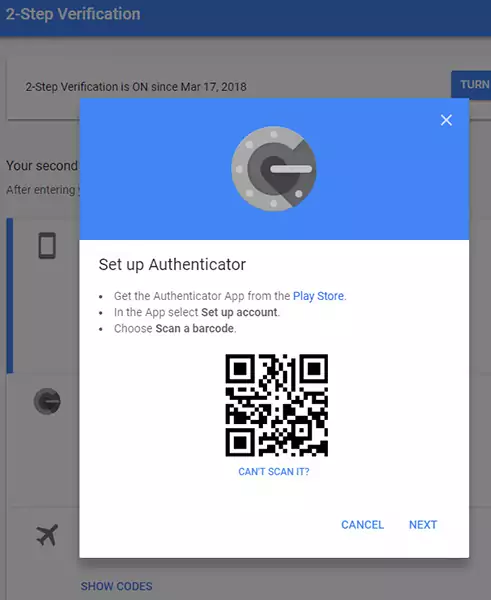
Print Your QR Codes.
You may also go a step further, and apart from printing your Backup Codes, you may also print your QR codes which makes Google Authenticator recovery much easier. Alternatively, you can click the Can’t Scan It option below the QR code displaying the Secret Key, which you can then copy and save. So, for example, my 1Password manager can generate the 2FA codes automatically like any other Authenticator app, but at any time, I can reveal the Secret Key if I need to.
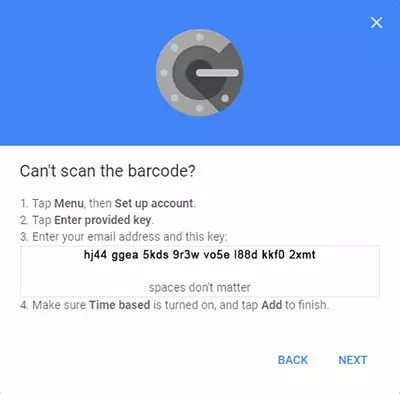
Print or Save the Secret Key.
Ok. So we saved our Backup Codes and the QR Code.
However, we can do one more thing to help us recover Google Authenticator app after losing our phone.
Please take a look at the image above with QR Code on it. What do you see just below the QR Code?
CAN`T SCAN IT?
The QR code generated on the screen is based on the Secret Key, which can be revealed and manually typed in the Authenticator app if your camera doesn’t work. We can, however, copy this code and save it for later use.
Add the account to your Google Authenticator app by scanning the QR code displayed on the screen. Then print the QR code, making sure to keep it in a safe place. Next, click the Can’t Scan It option to reveal the Secret Key used to generate the QR code. Copy the Secret Key and keep it in a safe place. Finally, press Next and type the code generated by the Authenticator app to complete the process.
Excellent, you now have 2FA enabled for your Google Account. You saved your Backup Codes, printed the QR Code, and hopefully, if you followed my guide above, you have also printed or saved the Secret Key.
You can add Google Account to your 2FA app by either scanning the QR Codes saved earlier or by typing the Secret Key.
Reset Authenticator App using the Change Phone option.
This step is crucial. You have to use the Change Phone option to ensure that the phone you lost cannot generate a valid 2FA code.
Yes, they are useless without the password but don`t take the risk and reset the Authenticator App in your Google Account 2-Step Verification settings. You will have to do this anyway if you want to set up Google Authenticator App on your new phone.
After recovering access to your Google Account, go to 2-Step Verification and select the Change Phone option under Authenticator App.
Scan the QR code with your new phone. You may also print the QR code and keep it in a safe place. Once you scanned the token with your Google Authenticator App, press next and confirm the code to finalize the procedure.
Note: You may use the second phone as a backup option.
Everyone has some old phones lying around. So grab one, make a factory reset, disable WiFi, and set it up on both devices every time you enable Two-Factor Authentication or create a new account.
You may treat this as emergency access to your Google Authenticator app. For example, if your primary phone was stolen or lost, you always have a backup phone with Google Authenticator installed.
Change your Google Account Password.
It seems obvious, but I almost forgot about it. Be safe, and if your phone was stolen or lost after accessing your account, change your password. Hopefully, you are already using Password Manager, so get through all your accounts and change passwords. Better to be safe than sorry.
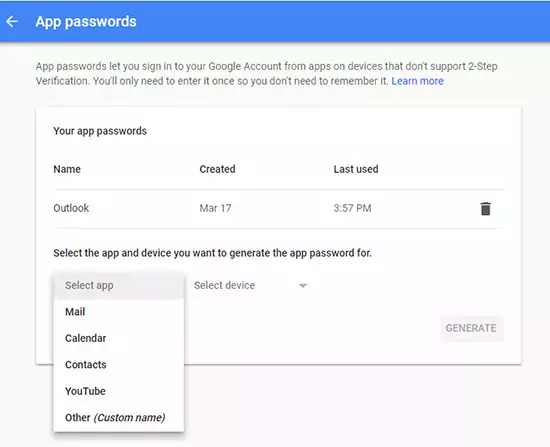
Revoke your App Passwords.
An App Password is a one-time password issued to you by Google to authorize access to your Google Account for applications and devices that do not support Two-Factor Authentication. For example, Microsoft Outlook or Mozilla Thunderbird.
Revoke the App Passwords for any applications or devices you own that you no longer use were stolen or lost. Removing the App Password will prevent anyone from accessing your Google account from that device or application.
For example, on the image below, a Microsoft Outlook email client application I`m currently using on my Surface Pro has been authorized to access my Google account with App Password.
If my tablet gets stolen or damaged, I will revoke the App Password for that application and any other application on that PC, preventing anyone from accessing my account.
Recovering Google Authenticator on a new phone without the old phone.
Recovering your accounts on a new phone without the old phone is difficult, to say the least. With no QR codes or Secret Keys access, contacting individual account service support may be the only option left. Most services offer an account recovery option, although the process typically takes some time, and there is no guarantee of success.
If you have access to your old phone, you can quickly transfer the Google Authenticator 2FA codes to a new phone by using the Transfer Accounts option available in the app.
You can also extract the Secret Keys from your Google Authenticator app that will allow you to transfer the account to any other 2FA application like 1Password or Authy.
Transferring Google Authenticator to a new phone without the old phone.
Without the Secret Key used to generate the TOTP code, it is impossible to recover the codes on a new phone without the old phone. The Secret Key stored on the device is necessary to generate the TOTP codes, if you have lost the device, there is no way of transferring the Google Authenticator app accounts to a new phone.
Alternatives to Google Authenticator App.
I have tried all the most popular authenticator apps over the years, and all were either unable or hard to configure on multiple devices. Just read my article about using Google Authenticator on multiple devices. It will give you an idea of how difficult it is to keep your devices in sync.
One day though, I decided that I needed a Password Manager and, after some testing, ended up buying a license for 1Password. The 1Password has the 2FA Authenticator option already built into the manager. You can check my other article, where I have described how to add 2FA codes to 1Password; I’ve even included a video tutorial.
With a single click, the 1Password manager will scan the QR code generated on the website and save the Secret Key for you. And the best thing is that the next time you try to log in to your account, the 1Password will automatically populate the 2FA code for you.
Summary.
Whether your phone or tablet was lost, damaged, or stolen, accessing your accounts without 2FA does not have to be so painful.
Just take the time to set up the accounts correctly in the first place. Then, save your Backup Codes. Whether you print them, store them on a secure storage device, or even take a picture, make sure you have them when needed.
Your backup codes are usually the only way to restore access to your accounts, so take care of them.